
The Ways You Can Claim and Verify Your Website Using Google Merchant Center: Tutorial
To launch Shopping campaigns, you need to validate and claim your e-commerce website with Google Merchant Center.
Please continue reading if you are logging in with your personal Merchant Center account. If not, the verification code will be sent to you through email, allowing you to move on to Chapter 2.
Step 1: Obtaining the verification code
Copy the HTML tag code after signing in to your Merchant Center account (or tag).
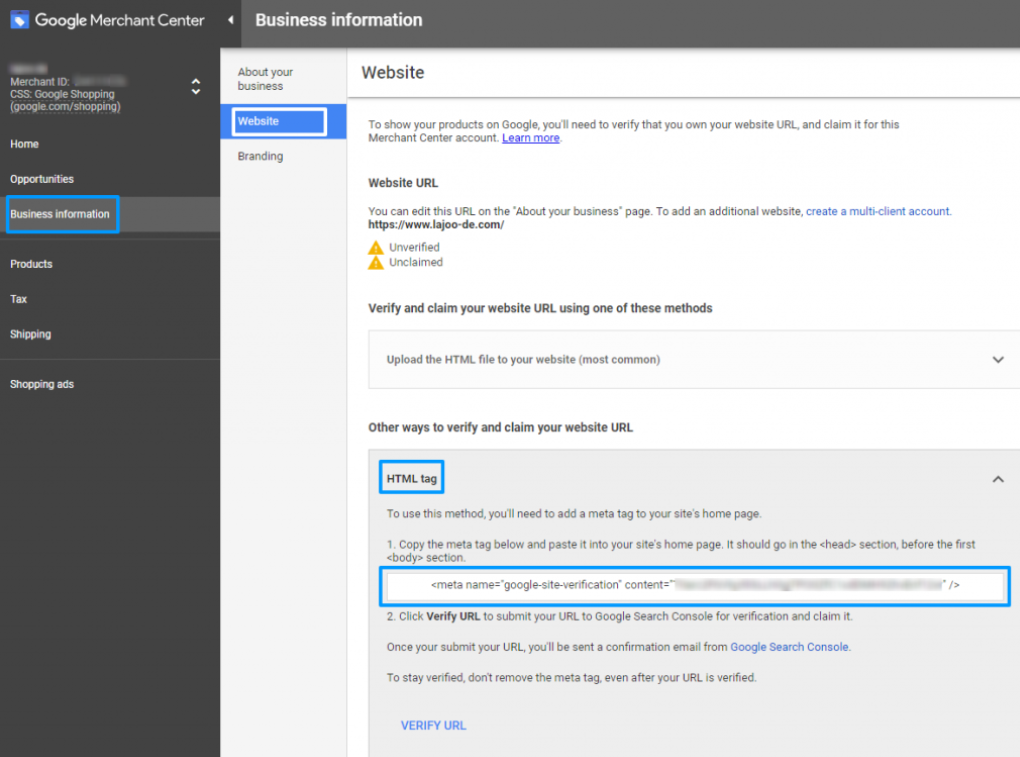
1. Navigate to “Business details,” “Website,” and “HTML tag” in Google Merchant Center.
2. The tag should be copied (for instance: <meta name=”google-site-verification” content=”ffae76-…-98addq9″ />).
Step 2: Verification code placement
The environment of Shopify
The methods below should be followed to paste the Google Merchant Center verification tag into your theme’s <head> tag. The <head> tag can be overloaded by some themes, so be careful. If so, check your theme’s options or get in touch with the creator.
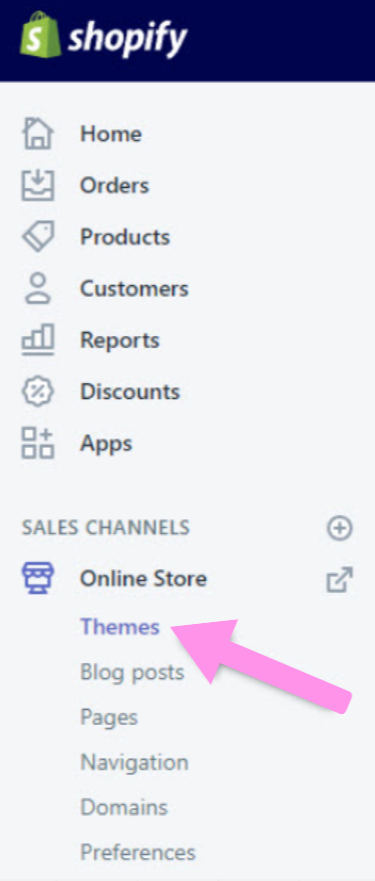
1. Visit Shopify’s theme editor by selecting “Online Store > Themes.”
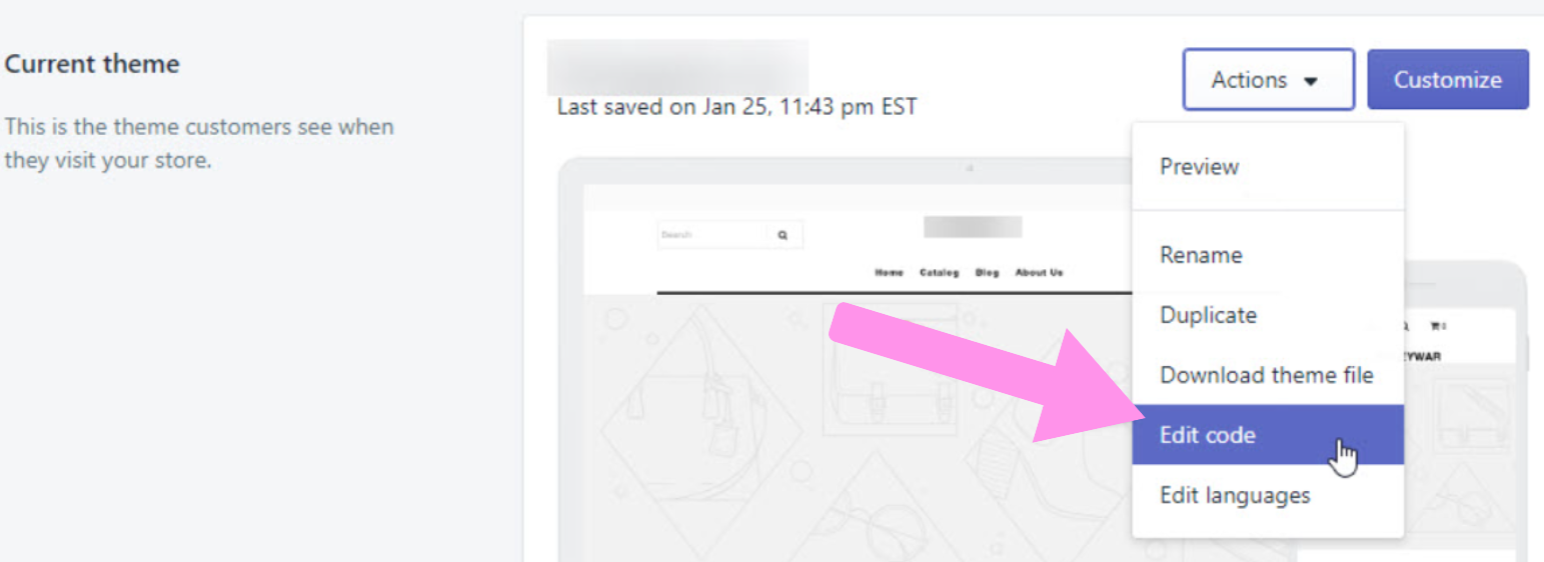
2. Select “actions” by clicking in the top right corner. A menu will open; select “Edit Code.”
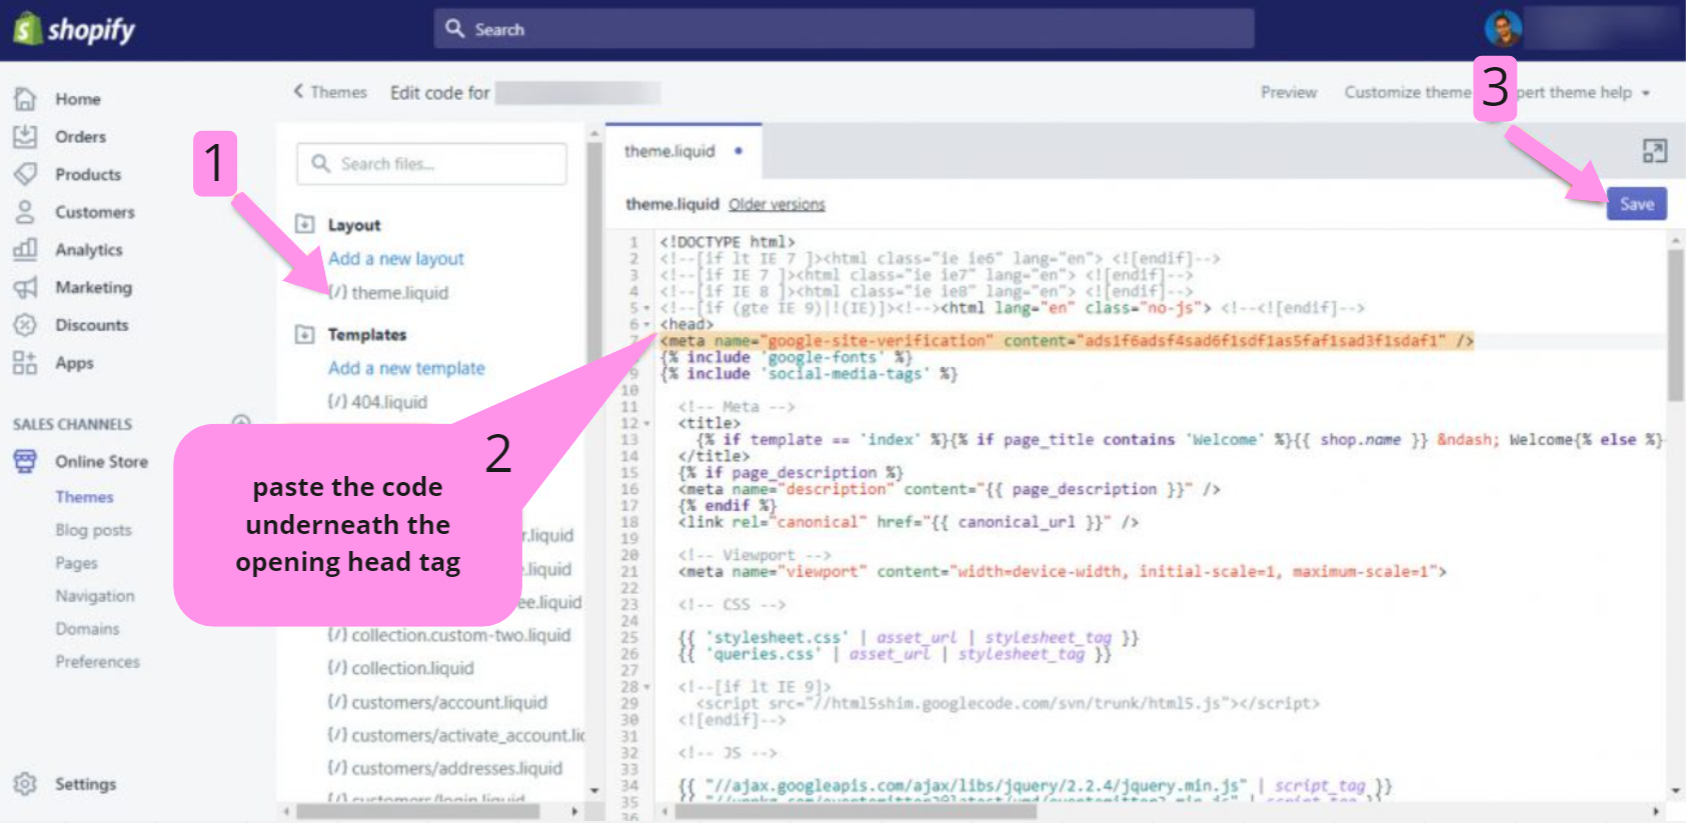
3. In the layout directory, click theme.liquid. Please insert the tag <meta> that you acquired from Google Merchant Center at this location and click “save” in the section <head> (under the tag opening <head> with the other meta tags>).
The environment of Prestashop
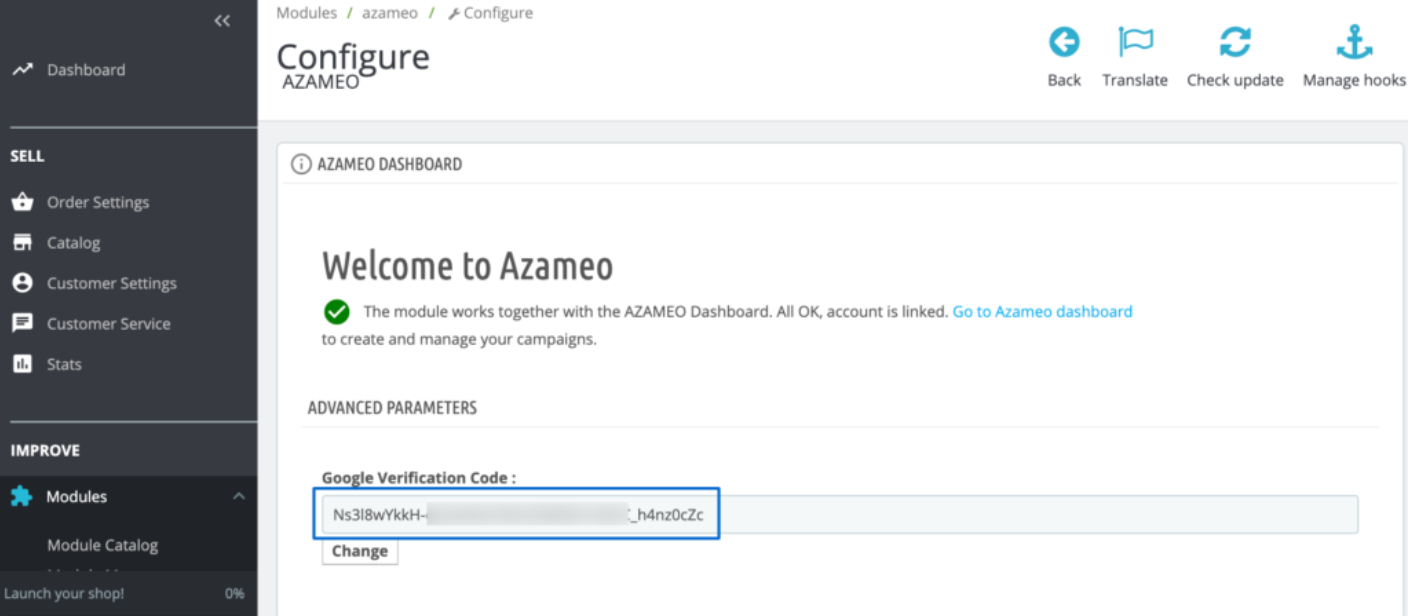
The Azameo Prestashop plugin makes it simple to set up the verification code.
1. Navigate to Module Manager > Azameo > Configure.
.2. Enter the variable content (verification number) in the Google Verification Code box. Example: Ns3l8wY-…-h4nz0cZ
3. To save, choose Change.
The environment of WordPress/WooCommerce
The HTML tag can be added in one of two ways to the <head> section of your WordPress website:
Technique 1: Insert the tag in your child theme’s header.php file. This option needs you to either go through your webmaster or have some basic WordPress understanding.
Technique 2: Use an extension.
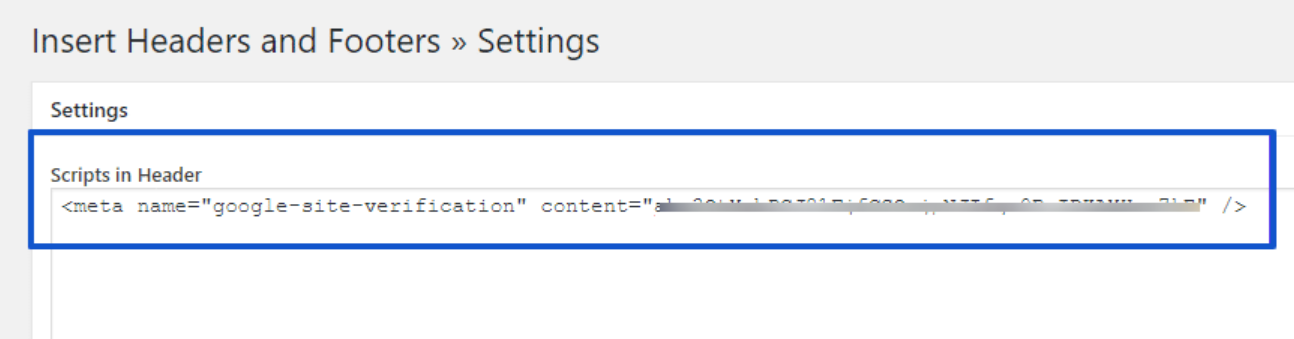
- Install the free Insert Headers and Footers extension, for instance, on your website.
- Paste the meta tag in the Scripts section of the header by going to Settings > Insert Headers and Footers.
- Press Save.
Step 3: Make sure to check the site
You can complete the check once you’ve added the tag to your website. Follow these steps if you’re using your own Merchant Center account. Otherwise, Azameo will automatically check your site and you will be set to go.
1. Return to Google Merchant Center and choose “Business information,” “Website,” and “HTML tag” afterward.
2. To finish the verification, click the “Verify URL” button.
Good work, your website has now been validated.
Was this article helpful?
Support us to keep up the good work and to provide you even better content. Your donations will be used to help students get access to quality content for free and pay our contributors’ salaries, who work hard to create this website content! Thank you for all your support!
Reaction to comment: Cancel reply