
Get Your Emails Flowing Again: Simple Solutions for Outlook’s Reception Issues
Are you tired of constantly refreshing your inbox, only to find that new messages are nowhere to be found? If you’re using Microsoft Outlook and are experiencing issues with receiving emails, fear not – troubleshooting may be the solution you’ve been searching for. Whether you’re using Outlook 2019, 2016, 2013, or 2010 for Windows, Outlook for Mac 2019, 2016, or 2011, or even Microsoft’s free web-based email client, Outlook.com, these instructions can help you identify and fix the problem at hand.
Common reasons behind Outlook’s email reception issues
Possible causes of not receiving new emails include:
- Outlook might be down.
- There is no internet connection.
- Messages are automatically directed to the Junk Email folder.
- A bad email rule is in place.
- Outlook is configured to function offline.
- An email profile may be corrupt.
How can I resolve the issue of Outlook not receiving new emails?
Whether you’re using Windows, macOS, or the online version of Outlook, the problem can arise at any time. But don’t worry, there are ways to fix it. Let’s take a look at some possible solutions to get your Outlook email back up and running.
Solution #1: Restart Outlook
Sometimes, Outlook (and other apps) can be a bit temperamental and stop working properly. If you find yourself unable to receive emails, one simple fix is to try closing Outlook and reopening it again. This often does the trick and clears up any issues that were causing the problem.
Solution #2: Ensure that the device is connected to the internet
If you notice that the Outlook status bar displays “Disconnected”, “Working Offline”, or “Trying to connect” statuses, it could indicate some network connectivity problems or that Outlook is set to work offline.
Solution #3: Make sure that the offline settings are configured correctly
If you’re facing problems with Outlook on a Mac even after disabling Work Offline, there could be a need to log in to your email account and adjust your settings.
Switching back to online mode is a straightforward process:
- Navigate to the Send/Receive tab and select “Work Offline”.
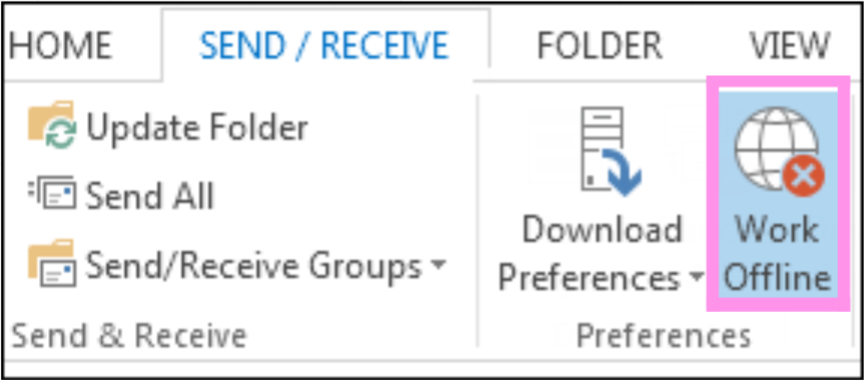
If the background of the button is shaded (as indicated in the image above), you are not connected. If, on the other hand, the colour of the button is clear, you’re connected.
Solution #4: Check if any messages have been filtered to different Outlook folders
If you’re using Outlook.com, you might find those messages in the “Other” section. Alternatively, if you can’t seem to find any new emails in your Inbox, it’s possible that they’re being redirected to the Junk Email folder.
Microsoft Outlook features a junk mail filter that divides unsolicited emails into separate folders. Occasionally valid emails are mistakenly labelled as spam. To retrieve an email from the junk folder and avoid future messages from the same sender being classified as junk, follow these instructions for Outlook versions 2019, 2016, 2013, 2010, 2007, Outlook for Microsoft 365, and Outlook Online:
- Firstly, navigate to the “Junk Email” folder in your Outlook.
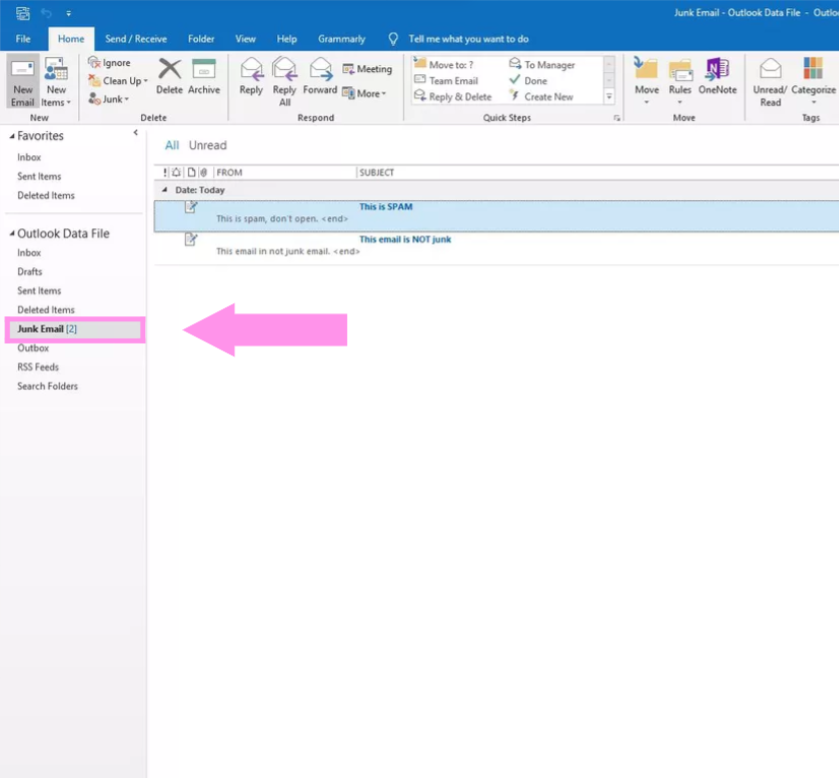
- Highlight or open the email message that needs to be recovered.
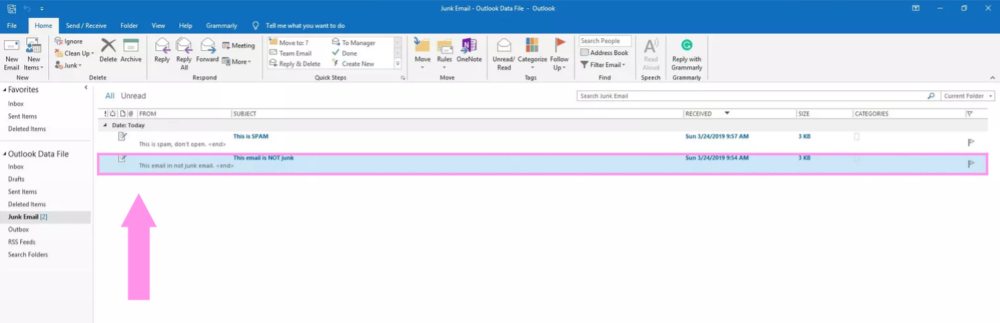
- Go to the Home tab if the email is open in the “Reading Pane” or highlighted in the folder list. Go to the Message tab if the message is open in a separate window.
- Select “Junk” in the “Delete” group.
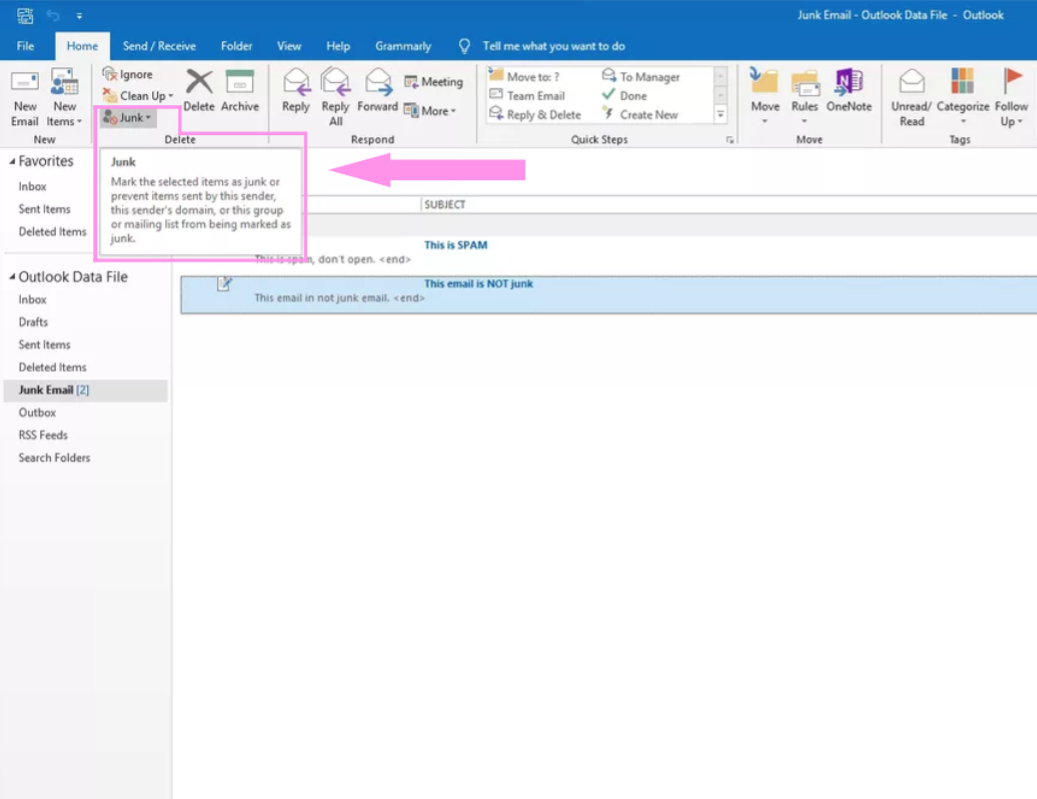
- Press Ctrl+Alt+J or select “Not Junk”.
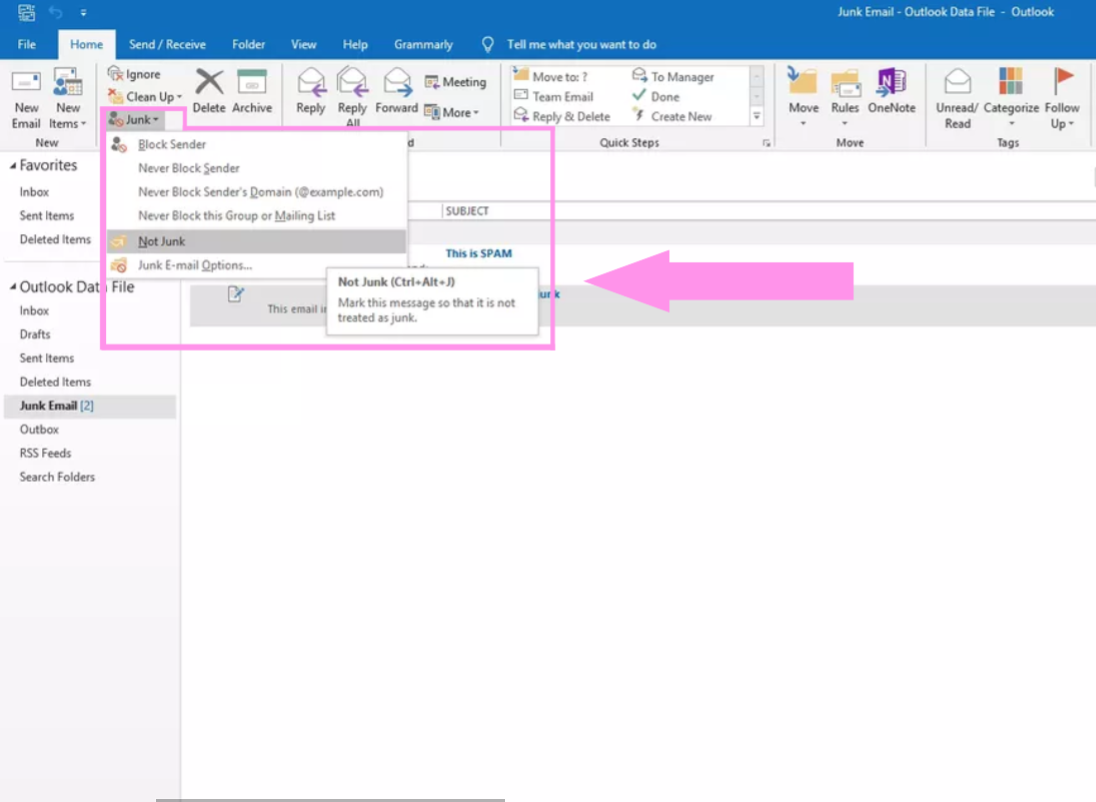
- Choose the “Always trust e-mail checkbox” to add the sender to your safe sender’s list so that messages from their addresses are never considered as spam.
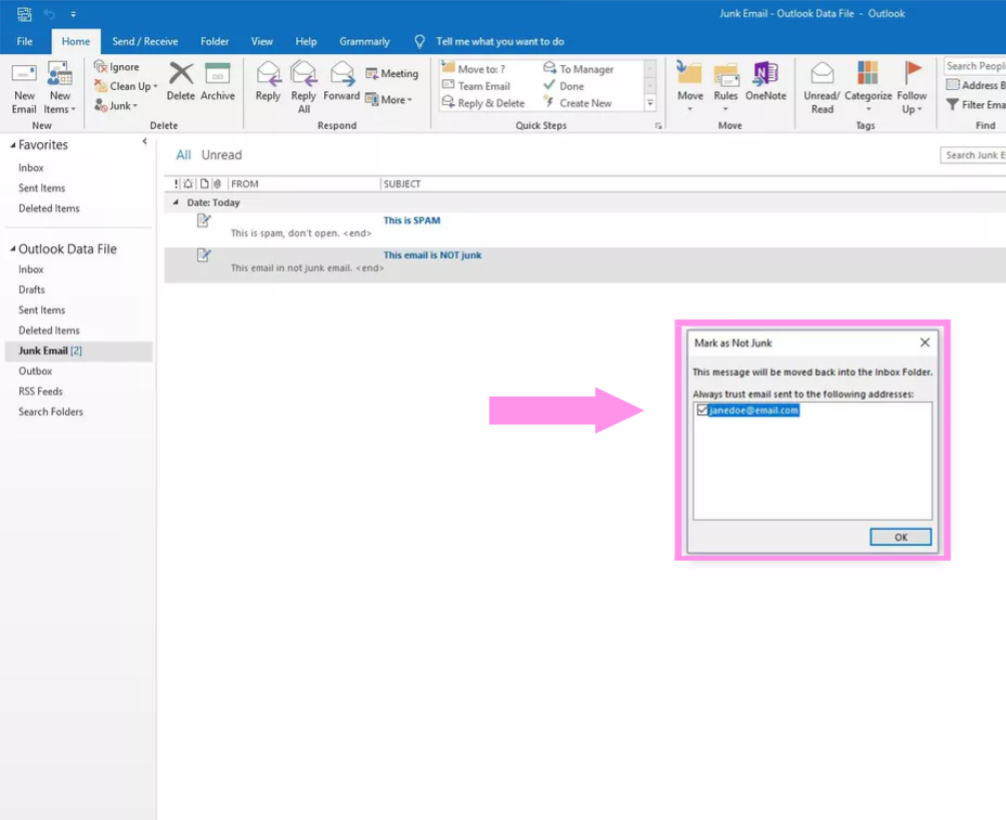
- Press the “OK” button.
To recover a message from the “Junk E-mail” folder in Outlook 2007, please follow these instructions:
- Navigate to the “Junk E-mail” folder.
- Find and highlight the message.
- Either click “Not junk”, press Ctrl+Alt+J or select “Actions” > “Junk E-mail” > “Mark as not junk”.
- To include the email sender in your list of trusted senders, choose the option of “Always trust email from”.
- Press the “OK” button.
Solution #5: Monitor other devices you have
You may have received and saved the message on another gadget like a smartphone, tablet, or office computer. In case the Outlook POP email settings do not permit server-side storage, the email that you can’t locate might be present on the device where you initially viewed it.
Solution #6: Set up a new Outlook profile
Outlook utilizes a “profile” to save details about the email accounts you establish and the configuration settings you’ve selected to specify the location where your email messages are sent and saved, be it on the mail server or your device. When your Outlook profile becomes corrupted, it can result in the interruption of email reception. To create a new profile, follow these instructions:
- Open Outlook and go to “File” > “Account Settings” > “Manage Profiles”.
- Click on “Show Profiles”, then select “Add”.
- Type a name for the profile in the “Profile Name” box and click “OK”.
Solution #7: Empty the Outlook cache
It’s possible for emails to become stuck in the incoming processing stage in Outlook and be stored in a folder called “ItemProcSearch”, which is hidden. To locate the missing email, clear the cache:
- Close your Outlook.
- Press Windows key+R.
- In the Run dialogue box, type in %localappdata%\Microsoft\Outlook, and hit “Enter”.
- Locate the “RoamCache” folder and double-click to access the cache files.

- Select all of the files by clicking on them while holding down the “Shift” key. Press the “Delete” key on your keyboard or right-click on the highlighted files and select “Delete”.

- Press “Yes” to confirm the deletion.
Solution #8: Take a look at your email rules
Your emails may be getting redirected away from your Inbox, forwarded to another email account, or deleted if you have set up any rules.
Was this article helpful?
Support us to keep up the good work and to provide you even better content. Your donations will be used to help students get access to quality content for free and pay our contributors’ salaries, who work hard to create this website content! Thank you for all your support!
Reaction to comment: Cancel reply